SO! finally, another update on my experiments. as much as i dread getting to them, i enjoy experimenting. it's always a learning experience, however getting me to actually starting is another matter....
i have to state firstly, that any of you who bothered to get past the first paragraph, PLEASE READ CAREFULLY BEFORE ASKING ME QUESTIONS. a few disclaimers ahead.
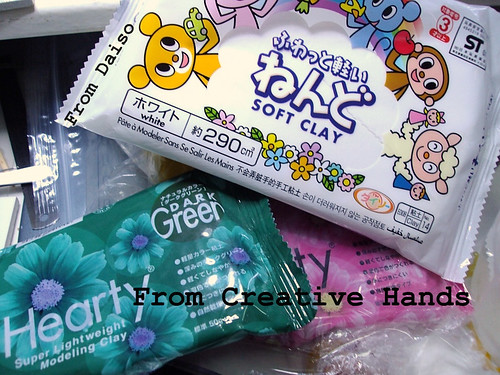
1) i work mostly with polymer clay, so please don't ask me for advice on which clay you should use etc. my reply will always be, try it out and decide. it's a very personal choice. don't ask me where i got my clay. i've already mentioned it in the pics. if you can't find it there, well. means they're out of stock, and you're out of luck. this is a sore issue for me, the lack of availability of materials, so i won't be entertaining any of those sorts of questions. heck. the 4 packs i have are the only ones i have to work with currently, i don't even know where i should get more or if i would even want to.
2) the experiment results here are based solely on my one time experiment. results may vary from brand to brand, as i always mix media while experimenting. also, i bought the yellow clay half a year ago from Daiso, and the Hearty clay -at least- 3 mths back, so the quality of the clay may have deteriorated. as far as i know, air dry clay does have a shelf life, unlike polymer clay. keep that in mind when i'm bitching about working with it later on ;)
3) TO NEWBIES:
all that i know is included in my links, and they can be found
<<======thataway that's where all i learnt what i know, and from helpful hints and tips from lovely people who i'm lucky to have befriended via the powers of the internet. i truly appreciate any constructive criticism, tips and pointers. do your own reading and actually get to playing -with- the clay before inundating me with tonnes of vague questions. it's all there. you just have to work for it. TO REGULAR READERS thanks for putting up with my crabbiness. experiments tend to put me in a foul mood > <

i used the lightweight type. i didn't buy any resin air dry clays as they are really expensive. these are only 1/10th of the price of resin clay.

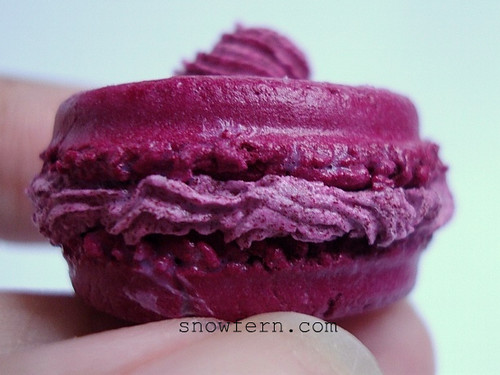
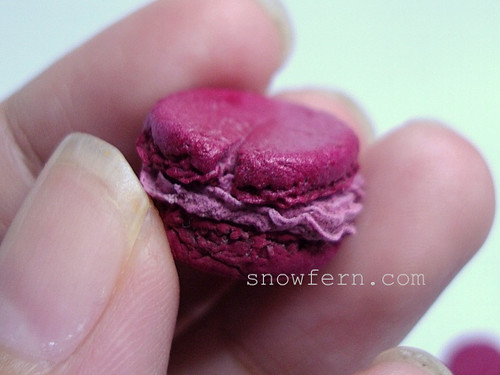
the magenta reminded me of some macarons i made in 1/12th, i originally pinched off a tiny bit and tried to make a flower, but the clay was too 'puffy' and 'airy', so different from polymer clay. moreover, the more i mixed it, the weirder it got, white stuff started surfacing and it wouldn't stick together. i wonder if it's drying out too fast at such a small volume, so i decided to make larger items instead. above shows the whitish stuff, i wound up adding a little bit of white glue and mixing it in to the semi-crumbly mix of clay, waited around an hr for it to dry and prodded it with my needle tool to simulate a grainy bread texture.
ideas: good for crumbly cakes, tarts slices. chinese almond cookies, multi-grain breads. maybe even hard cheeses.
NOTE TO SELF: will have to take into consideration results -after- sealing, and which sealants work best for whichever desired results.

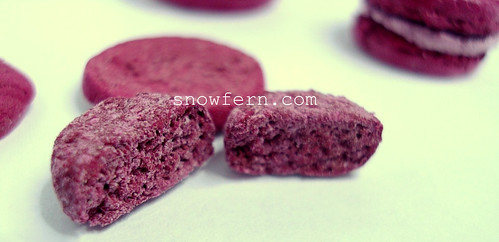
i stuck some of it into one of my miniature aluminum cake pans, waited a while for it to dry, textured the top to simulate (somewhat unsuccessfully) a baked cake, and sliced it in the middle once it dried. nice texture for a semi-heavy cake, i think.
ideas: mousse, cake prep board

the half on top is in its original texture, at bottom, i poked at it with my needle tool. definitely a texture i like and would like to use.
idea: biscuits, tarts, gingerbreads
NOTE TO SELF: check shrinkage after baking, and how well it interacts with polymer clay.

the macaron bit has been sealed with a matte sealant, i touched it before it dried thoroughly so you can see the bits where it's unevenly applied. i wanted to use my can of acrylic sealant but i decided against it as the one i got dries sticky, don't like it at all. will buy a better brand in future if i decide to work with air dry clay again.
what's good is, after sealing, it looked even more realistic, i was pleasantly surprised at how good the effect was. however, i doubt i can turn it into a charm or keychain, the clay is simply too soft and would not be able to withstand the abuse.

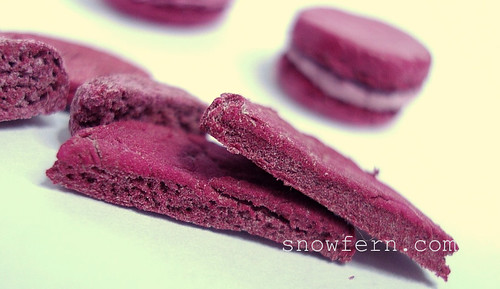
after drying, there is a -little- shrinkage. not very noticeable, but more obvious where there are cracks. i had deliberately made a macaron with a crack (like some real macarons have) and it widened enough to be obvious.

i mixed some of the yellow (Daiso) with magenta (Hearty) and got a nice pink raspberry cream type mixture. i was actually hoping to get an orange colour, but i guess the two didn't mix well. or i'm challenged that way. anyhow, drats, i just looked at the items, the picture colours aren't accurate at all! grr. anyway, i'm more interested in textures at this point, not the colours.
i added a few drops of water , mixed well, and got a semi-gritty paste, stuck it in a piping nozzle and swirled away~ as expected, it took a little longer to dry. once dry, it held its detail after i poked and prodded lightly at it. i suspect it might be easy to tear it apart though. for the lighter pink swirls, i added a touch of texture paste to some leftover 'raspberry cream' mix. i had hoped it would strengthen it somewhat.

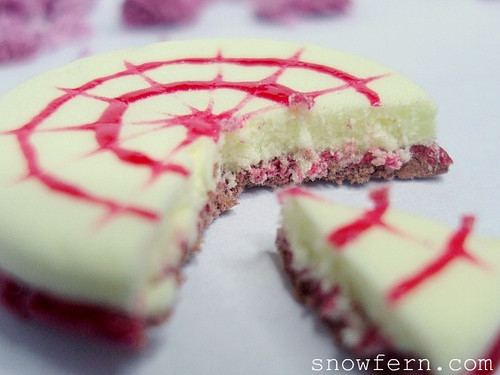
ok this one, i loved. the cheese part (it's actually 'yellower' IRL) was made from Lemon Yellow clay (Daiso) straight from the packet, biscuit base was the same clay, with quite a bit of brown and ochre acrylic paint mixed in. i initially mixed it in while wrapped in clingfilm, but it tore and i used my fingers instead. the acrylic did not stain my fingers at all.
i assembled the cake using ruby red gallery glass to simulate strawberry jam between the two layers, and also for it to act as a glue. once it dried, i messed up the first slice as i used a blunt blade, but the next 2 slices were cleaner. the results are startlingly realistic! I LOVE IT! problem is, again, sealing it. air dry clays require sealants or once it comes into contact with water it'll 'melt away' into sludge. :-/ spray sealants would probably work best, but i'm also fearful that the strength of the canister spray might blow away my mini items heh.
the Daiso clay was finer, easier to mix, dries less quickly. maybe because the Hearty clay might have been on the shelf too long, i'd gotten it at a clearance sale for only $2 each. Hearty is 'puffier' and less inclined to hold on to details, required a bit more manipulation than i'd care for.
PHEW. ok. on to the texture paste experiment, part 2 (you can read part 1
here).
well, when i first experimented with texture paste (Marie brand) i hated it. LOATHED it. they turned out semi-glossy/plasticky and rubbery. annoying.
chucked the tub aside and recently, decided i should give it another try. this time, as suggested by Betsy Niederer and other CDHM pals, adding cornstarch to the mix.
Special thanks to Philippa for providing all the info on tips, syringes and texture paste recommendations. you can see her amazing work at
http://www.toddtoysandminiatures.com/
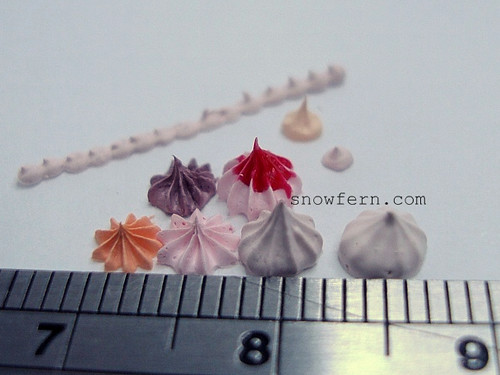
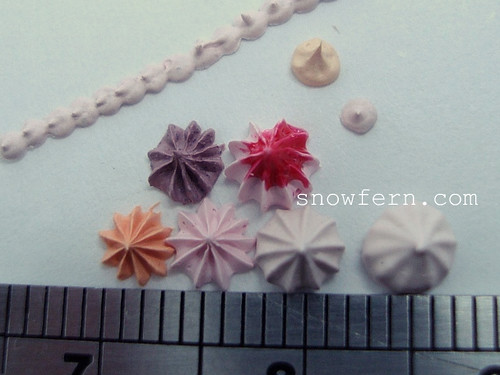
from right to left:
Front row
1) 1:2 cornstarch:texture paste + pink acrylic paint
hardly any definition. colour not prominent, even though i added a rather considerable amount of pink. i had stupidly forgotten the texture paste is WHITE. white + pink = paler pink. duh. *smacks own forehead*
2) added a touch more cornstarch to remainder
3) 2:2:1 cornstarch:texture paste:ruby red gallery glass
armed with foreknowledge, mixed new batch, felt that mixture was a little too stiff
4) 1:1 mix, with touch of red/yellow acrylic paints to make orange
originally added tamiya acrylic orange, but results weren't desirable.
2nd Row
1) dripped ruby red gallery glass to simulate strawberry syrup.
2) disastrous 'chocolate' meringue. i give up. i don't know how to use texture paste to make chocolate meringues. they always turn out purplish when i tint it with acrylics :(
Background
pale orange using self-made piping nozzle. pink blobs using brother's syringe + needle from his last visit to the dentist. don't worry, i washed it ;)

so there you are. results of 2 days' worth of experiments, lots of washing, and wasted materials.
hope this is helpful, i think i've covered everything i learnt, anything else i've missed, means i have more to learn....
TEACH ME! or comment, if you've found this useful ;)