Showing posts with label Daiso. Show all posts

Tuesday, April 14, 2015

New Video: Vacuum Forming for Miniature Making - A Brief Introduction


Hi~! I'm feeling very self-conscious listening to myself, I guess it takes a lot of getting used to. And my voice doesn't sound like me at all.....


I've missed out a few points, but I suppose that will be remedied in future videos, please feel free to leave comments on what you would like me to cover in my next vacuum form video, and I will try to go a little more in-depth to the best of my ability. 

Also, if you have enjoyed my videos, perhaps you would like to consider visiting my Patreon page.

https://www.patreon.com/snowfern

Supporters will receive more perks as I put together some rewards and Patreon-exclusive content. This will include behind the scene photos, technical knowledge and even step-by-step videos and tutorials. I will still create free-to-public content, so for my loyal followers, don't worry :) You can help me keep producing content by sharing and liking my videos, facebook page etc etc :)

Thanks for watching! *embarrassed grin*

Sunday, March 31, 2013

DIY Drying Rack - How I did it (a sort of, not-quite, tutorial)

I'm back! well yeah I did update yesterday over on my doll blog, http://clover-tea.blogspot.sg/, but thought this entry would be appropriate in either blog, so here it is! March was supposed to be a busy month for me, commissions wise, but I did fall sick with the flu for quite sometime :( While drifting in and out of my medicated haze, I tried to figure out the best way to prepare for the commissions once I healed up. And on a rare family trip to Daiso (yes stuffy nose and all ha!), I raised the issue of having not enough horizontal space to dry my items, and asked my brother Ben if he could help with coming up with a solution to go vertical without having to install a large shelf or make more holes in the walls.....he suggested using a dish rack as the 'spine' to stack up the trays, since I couldn't get more of the stackable dish 'tables' i used previously to stack my stuff.

Since I'm always broke, I was on a tight budget, and Daiso seemed to have alot of possibilities for affordable solultions. the key things I was looking for was:

- Compact
- Portable
- Versatility
- Utility
- CHEAP

yeah tall order, right? looking around the City Square Mall branch, they had run out of the dish rack and so I thought, maybe I'll look around my neighbourhood hardware stores and perhaps i'll figure something else out. Fast forward a few weeks and while out with Asuka yesterday, we went on a scenic route (read: took the wrong bus) to Tampines from Stargek (they're having an Easter weekend 20% sale! ends today) and I managed to come to a decision on the rack idea since the wooden dish rack was available. ^ ^

I don't have step-by-step pictures, but it's so dead simple you can probably put it together faster than I did (i wasted 3 cable ties fiddling around with it to figure out the best configuration to hold it together).

Items used:
- 1 wooden dish rack
- 4 stainless steel trays
- cable ties, i used 12
- 1 plate stand

OPTIONAL
- standard army belt (huhuhu impulse purchase from pasir ris interchange)
Total cost: $12 from Daiso, cable ties I found lying about at home so I used those but you can probably get them from Daiso or a neighbourhood hardware store. belt was a gift from bf and meant for me to use on a different bag but whatever :P maybe i'll use my own 'fashion' belt since it's just sitting in my wardrobe hrmm.......

The only dismantling you need to do is on the plate stand. I chose the larger sized one, approx 17cm tall for this project and MADE IT WORK. just pull it apart at the hinge

cable tie the two pieces to each 'trunk' of the dish rack. you can click on the photo for reference on where you can secure it. I've secured it this way so the angle will allow the trays to slot in pretty parallel to the ground.

me being clumsy all the time, I decided to add 'stoppers' to make the whole rig more secure. as you can see in the photo on the right, there is a slight gap for the tray to 'catch' on to. prevents accidental knocking or sliding of the trays. 


At this point, you should have a working rig/rack thing. however, the trays are pretty heavy and i didn't want to risk having it topple forward once they're filled, so i've secured it to my trolley with the army belt (THANK YOU BF!) left it with no room for movement, it's very snugly tied there ^ ^ Perfect spot too, since the trolley has coasters and the fan blows directly onto it (it's usually where I place my stuff to dry too!)

I suppose if you're putting it on a table you can maybe tuck a box or pencil case under the lowest rung to keep it from toppling forward, but until I find a need to do that, this will work for me :D

TADAH!~ super happy right now in spite of the pain. must be the painkillers' side effect HAHAHHAAHAHHA *delirious laughter*

anyway. hope you've found this useful, share with your friends! comment if you've made one for yourself, better yet, link your photos!
~~~~~~~~~~~~~~~~~~~~~~~~~~~~~~~~~~~~~~~~~~~~~~~~~~~~~~~~~

Notes:
- for the trays, it's up to you on whether you want the ones with holes or not, me, I work in a non-airconditioned environment + fan, so the humidity doesn't help with the drying process for my clay, so I thought better to have the ones with holes for better airflow, and I always lay my ADC items on paper napkins/serviettes to dry anyway so they won't fall through or stick to the tray, it's just for support. Also, this means I can also use the trays for baking my polymer clay XD YAY VERSATILITY
- you can probably use other sorts of racks or whatever, i chose this one cos it's at the perfect gap size for air to circulate, and for the size for most of my mini-items. that, and the combo of my favourite materials, clear plastic, wood + metal, all-in-1 = WOOT. maybe i should name this my 'frankendryingrig' hurhur
- ok i'm rambling. more than usual. painkillers definitely kicking in. BYE

THANKS TO BENJAMIN FOR COMING UP WITH THE IDEA! :D

Saturday, October 27, 2012

Lighten up!


1:12 diorama (eh?)


*groans at own pun*

The lights are IN! and ON! and....finally, I have a 'proper' roombox to take product photos in! XD

Ever since the magnificent Pepper of http://mitchymoominiatures.blogspot.com/
posted a very comprehensive lighting tutorial, I had been itching to give lighting a try. I thought I could get all the materials locally at Sim Lim Tower, alas, they had nothing to scale for 1:12 T-T. I finally relented and spent countless hours scouring greedbay and googling for the most affordable suppliers (shipping to SG is often higher than the items themselves garrrrghhh) and waited patiently for them to arrive.

and then waited somemore.

worked on the roombox/diorama/scene....

waited s'more.

then i gave up waiting. cos the electrical wire arrived first (although it was the last item i ordered), but the LED lights/resistors and battery casings just refused to make an appearance. frustrated, i decided to just go ahead with whatever i had.

since i'd already 'bashed' some IKEA Billy lights for 'the challenge that fizzled out', why not re-use them?

and since i had a couple of these keychain lights from Daiso, why not use those too? I googled for some paper lampshade templates and came across this one on Instructables. OOOOOOH it made me go on a desktop laser machine video rampage....GRAGH I WANT ONE SO BAD IT MAKES MY TEETH ACHE. alas, being broke and all, i went in search of an easier one. AND FOUND THIS AMAZEBALLS MODERN ONE.

of course it had to be made in mini :D the template provided in the instructable was for a life sized one of course, and so i came up with my own...since the idea isn't mine, i wasn't sure if it would be alright if i posted a tutorial on how i made it.....then again it's all kind of 'generic'...i suppose i might ask the author for permission to post my own version for 1:12 if enough people want to know how to make it (though it -is- DEAD EASY to modify from the life sized one!)

ANYWAY


working with the lights brought up vague recollections of  hazy secondary physics (and primary school) lessons...hazy because I'm one of those terrible students who sleep frequently during classes. :-/ so armed with a dodgy soldering iron, sheer tenacity and lots of swearwords, i put everything together and SURPRISE SURPRISE IT WORKED OMG OMG OMG (and i hardly even hurt myself!)


hurhur. the ceiling was the backing of an ikea glass frame thingy that i'd kept after the glass portion broke :X battery casing purchased from a neighbourhood hardware store....i'm quite new to building and bashing stuff from other stuff lying around so it took quite a bit of trial and error (and re-reading of Pepper's tutorial a gabillion times) to put everything together, BUT I DID IT.

and after all that, i walked out of my room to discover that the LED bulbs off greedbay had arrived.

*facepalm* i have the best timing ever.

i quickly tested them out, but 2 out of the 10 LED bulbs that I purchased were duds :( As you can probably tell, I'm more of a 'glass half empty' type person. But given my moderate successes with bashed together lighting, WHATEVER.

moving along.

 test shot under all the lights + my worklamp
aaaand, obligatory shot of bf's mom's birthday gift. made a similar one for my aunt too, but ran out of time to take pics of the two together T-T it's in 1:6, and Yotsuba seems to be wondering if the orchids are edible....probably me just projecting, since i'm hungry at 3.19am now.

the pitcher/jug was inspired by Marlies' easy to follow tutorial here:

http://marliesminies.blogspot.sg/2009/03/draw-pattern-that-you-want-to-use-on.html

re-drew and re-sized the template for this pitcher closer to 1:6, might blog a little more about it since i came up with my own template etc. but it's a pretty common sight anyway, so....*shrug* not quite 'my style' but i sure hope my aunt and bf's mom like it!!!!

i'm sure i've missed out some links and stuff, but i'm just so happy i wanted to show off like a little kid who has a new toy. meanwhile, here's a sneak peek at another project Asuka and i are working on :)

(btw, Sans, that's the magnifier lamp that my brother gave me, but i broke the clamp portion while shifting my workspace stuff around QQ)

it's great to be back! hope to update more frequently now that i have one less excuse for not taking pictures.....XD

(and THANK YOU SOOO MUCH PEPPER YOU ARE AMAZINGGGGGGG)

Thursday, April 28, 2011

more ADC stuff, and i went shopping!

the neighbourhood bakeries in my area sell quite a number of these rectangular cakes. you can bring them home and slice 'em yourself!  i love mango on my cakes, so i made this mango and fresh cream slices...will demo them during the workshop....hope it gets approved XD

the round cakes are sorta incomplete, i plan to use these to demo to students how to 'cream' and decorate the sides....or, they could also use these as-is, naked sides and all XD

these are as elaborate as i will go for a basic course..... i'm no expert at ADC, so...LOL these are as far as i can go i think! so far i'm quite enjoying using ADC, went to Daiso yesterday to pick up more clay, and other supplies!

this is just -some- of my ADC stash. the grace whipped cream is not from daiso, of course....neither is the grace nor sukerukun. i usually go to either plaza sing or ion branch when i'm in town....sengkang only when i can't find what i want in the first two branches...i was surprised to find the 'normal yellow' and dark blue clays, usually i only see the lemon yellow and pastel coloured range! so happy one lor! ^ ^

there's another really heavy box of ADC i have, my stone clays and such, but i don't use them except for plates etc which i will eventually get round to, again, when i wish to test my patience. it's really hard to get plates done nice and evenly, even with the help of molds :(
these colourful little water-based pens were a steal at only SGD$0.65 each! on top of that, i received a further 10% discount :O i found them at paper market at plaza sing, i asked the lady when the offer would end and she said it's on till the end of the month, which means what, this weekend?? i couldn't resist and got 10 different colours! you should see my actual thumb-nail, it's multi coloured now LOL i had no paper to test the colours on :X it's got a fine and normal sized nib on either end, very useful for mini works, i intend to use them on flowers, fruits, the orange ones on ebi/prawns....kyaaa so egg-citing! i would have bought more but, i already spent too much yesterday, on stuff i didn't feel i wanted to buy but ....would eventually have to get for the event.

the stackable trays are actually for plates i think, i also got the colourful box to display/store my items for TDA (two sizes for the two main scales i'll be selling), some clamps for mini woodwork/paperwork, liquid chalk marker cos....ionos, i can always find use for liquid chalk? :P and GIANT CORN OMNOMNOM!!! i always tease bf for picking out 'horse feed' cos he likes to buy oats, grains etc as snacks. i say he's gonna chew out his molars before he gets old! but i super duper looooove this puffed corn snack. YUMMEHH i also like to fool myself into thinking it's healthy (it's not, the sugar/starch content is pretty high i'm sure, real bad for a diabetic)......*bashful grin*

ANYWAY! on to my preparations for TDA 2011!

some of this might look familiar, the glass jars i got from Ikea for TDA 2009 but never really used it...the glass container holding the candy canes i made that year too....but the shopping trolley is somewhat new! bf got it for me from candylicious, it's oddly scaled, i think 1:10 maybe? whatever! SUPER CUTE!

kids, don't smoke mmkay.

and then there's this cute little 1:3 cup and saucer set from a random shop selling Japanese kawaii stuff (donno the name, it's near the escalator i think 2nd or 3rd floor plaza sing?)...they happened to have just the one set left, so i bought the cup and saucer. maybe i should have gotten the full set, but i still don't have a doll T-T Chun and i were having a conversation about the cookies, and she wondered if it would work against a coffee cup like those mini cookies that usually accompany hot drinks?? KYAAA!~~! it does! see, i would never have thought of it -_-" silly me.


 Dale gave me a teaset that would be suitable for 1:4 when she visited us last year ^ ^ i always forget to use it cos i wrap it up so carefully in case i mess it up, but now that i'm trying to set up a display, it would have to come out of hiding!  kekeke. here you can see the cookie in contrast with the cup. a tad big, but perfect as a normal cookie for MSD or YoSD dolls i think ^ ^ those macarons will be on sale too, i will be making more colours...wonder what would sell???

i had a coupla more items come in the mail and display sets i purchased,  and foods i made...but my nose has been drippy all morning, i hope this is just another allergic reaction and not the very fashionable flu :O so i'll take more pictures as i progress on my tasks at hand.

next up, i think progress on the wholesale order list....got about 2 weeks max to deliver that LOL -_-"

Saturday, February 27, 2010

Tutorial: Easy 1:12 "Glass" Jars, Cups, Bottles etc.

As always, READ THESE FIRST:

1) items obtained from Daiso. it's a chain of $2 stores, meaning everything they sell there is $2 per item. you can check if you have one in your area here:

http://www.daiso-sangyo.co.jp/english/storeinfo/storeinfo03.html


otherwise, you can also probably check out your local hardware store to see if they stock anything similar. and if -that- doesn't work, then....:( sorry. you're better off purchasing ready made items then.....

2) it's not real glass. it's soft plastic, kinda squishy even, much like tubing for....fish tank aeration systems?

3) i'm sure you will find better ways of making or places to purchase nicer bottles, but i enjoy making minis out of found objects, with a little out-of-the-box thinking. so this isn't the most original idea, but heck, it's mine and so, be nice, don't steal images and stuff, ok? ^ ^

4) if you decide to share this tutorial, i'd appreciate it if you let me know first, or ask for permission to use my pictures. it's just common courtesy, and will make my day :) oh and uh, if you do make any of these via my tutorial, a credit would be nice too :) :) :) just link back to this tutorial page itself:

http://snowfern.com/2010/02/tutorial-easy-glass-jars-cups-bottles.html

on to the fun stuff!


tute 1
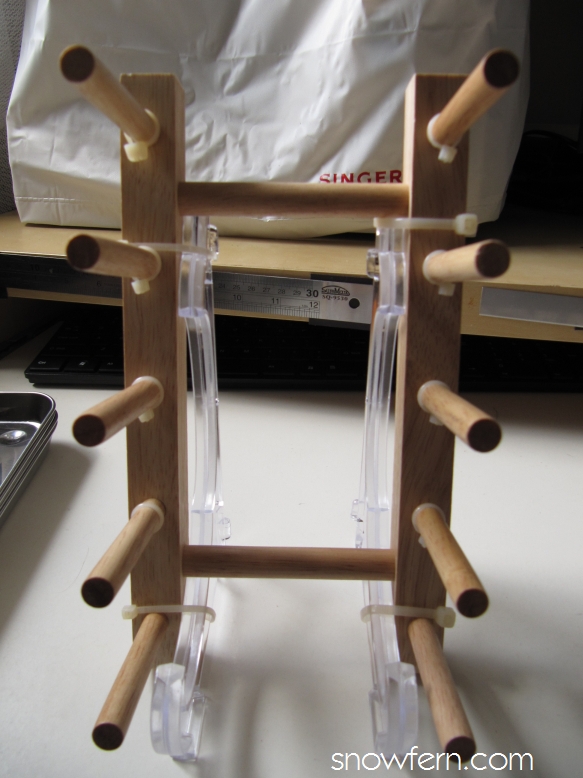
these are 'terminals', they're sort of like wire connectors i -think-. i found them at the hardware/electrical section in my neighbourhood branch of Daiso. says here "Produced for DAISO", so for those who don't have a branch near you, or that branch doesn't carry it, sorry you're sh*t out of luck. but why torture yourself like i do? :P


tute 2
looks remarkably like glass, right? for this set, the package contains 8 of these, and 8 smaller tubings (which i'd forgotten to take pics of). so that's quite a few jars, bottles and glasses you can make. :) at -least- 32 pieces!
again, this is pliable plastic. awesomeness.

tute 3
i've indicated where you can cut with either your craft knife, or scissors. although i did use a craft knife for the trial version, i've found it cuts easily with scissors as well. just be careful not to hurt yourself, and try to keep it as straight a cut as possible.

tute 4
you can decide for yourself how tall you'd like your bottle/jar vs glass to be. of course, the taller your bottle, the shorter your glass. if you don't understand what i'm referring to, the left side of the blade will be the bottle part, the right side, the glass. it will be made clearer in following pictures.

tute 5
TADA! the bottle!

tute 6
aaaaaand....the bottle standing up!

from here on, you don't really have to do the following steps if you don't intend to fill it, or don't care if it's a bottomless jar. but i -do- plan to fill it, probably with resin? but that's another project for another day. :)

moving along....


tute 7
find a piece of thin plastic. any old packaging material will do. i used a file puncher to do this job. the plastic is a piece of laminating plastic i had lying around. beats me why i have it, i don't own a laminating machine, i'm a hoarder like that. HA!

at first i tried gluing then cutting round the base of the bottle, but it all just seemed terribly cumbersome and untidy, so i went with the hole punching method instead.

btw. if you're intending to add items to the bottle, like pickled onions, cucumbers, pickles (XD ) etc, this would be a good time to stick them in. easier to arrange the items from the bottom of the jar.

tute 8
using PVC aka white glue, smear around the inner edge of the bottom. why PVC glue? ionos. guess cos it dries clear, is cheap and useful for almost everything, and well. it just so happened to work? haha.

tute 9
stick on the round pieces of punched out plastic. let dry! this pic shows the bottoms after the glue has dried thoroughly.
tute 10
TADAH!!!! GLASS AND BOTTLE!!! wooot woot! if you are worried that the bottoms aren't totally waterproof, i guess you could always give the bottoms a coat of gloss....i plan to do so later i guess....if i remember to....before i fill it with resin or whatever fake water medium you use. i wouldn't recommend liquid polymer clay since you really shouldn't bake these. they -are- plastic after all. i think i've mentioned that at least 2 times before.

SO THAT'S IT!!! oh no wait. there's MORE :P

tute 11
looky here! this is also a connector/terminal. 6 sets....let's have a closer look shall we?

tute 12
AHHH!! KETCHUP BOTTLE!!! or whatever squarish bottle you think it can be used for.

tute 13
deng deng deng deng~!~~

if you don't wish to fill it with resin, you can always easily paint the inside of the bottle with acrylics to simulate whatever the bottle is to contain. alternatively, you could also simply insert a strip of coloured paper, add labels, paint -over- the thing.....possibilities are ENDLESS!!! i only got these today so i will be fiddling around with it more. soon-ish. XD no promises though....

so there you go. my latest tutorial. let me know what you think! and remember to share with us if you've made any of your own ^ ^

p.s. try to resist the urge to squish the bottle after you've glued on the bottom, or it'll pop off rather easily -_-" esp if you haven't 'reinforced' it with resin filling yet......

-----------------------------

update on tutorial, now that i've let the resin set all night ;)

resin filled
did this like, 2am last night. so i didn't take care to prevent mixing in the bubbles :X don't matter, it's just practice and could pass for soda i guess.


poor drowning gummi bear
that's not a goldfish. it's a drowning gummy bear XD i made a few 1:12 gummi bears approx 2mm tall, a little larger than i'd like but heck. it's a freaking gummi bear. i bite their heads off first OMNOMNOM.

(before people think i'm a sicko, i admit. i -am- a sicko! nono, i originally wanted to see if resin with resin sank or floated, and the smallest resin piece i had around was the gummi bear. verdict, resin floats in resin XD )

get ready to sacrifice one
i filled on up to the top. this is because i recalled that resin does not stick to certain soft plastics, what better time to try???

add on to tute
my heart went "doki-doki" before cutting this. i guess if you had immense patience, you could finagle the set resin out of the flexible tube. but i don't, and i didn't want to pop it in the fridge to wait either (refrigerating the resin lets it shrink a smidge, and could possibly save 1 'bottle'). so i CUT IT OPEN. *evil laughter*

what i'm so excited about is that, the tinier bottle could be used as shoyu bottle, or a cute little snack drink bottle, and BEST OF ALL THERE IS NO SEAM.

again. i'm too pleased with myself. humility, where? XD

measurements of the tinier bottle:
4.5mm wide
6mm from top to base of neck of bottle (since the bottom cylindrical measurement is entirely up to you)

off to play with more minis, yay~!~