Showing posts with label I'm a giant challenge. Show all posts

Friday, December 16, 2011

I'm a Giant Challenge - EXTENDED! - PARTIAL Reveal

TA-DAH!!!!!!!


ok i know it's a little disappointing as it's incomplete :( I wanted to print out some 'posters' and put in more decorative stuff, but I ran out of time T-T
for those who aren't familiar with this project, you can see how I got started, and my progress, here:

http://snowfern-clover.blogspot.com/p/challenge.html

It is in 1:24 aka half inch scale. half the size of the usual dollhouse scale!


let me take you on a tour. it'll be a short one, considering how little I have to show you T-T
(NO PUN INTENDED)


you can see from the outside, little danishes and donuts.....all asking to be picked first!


the metal pie tins were supposed to act as little trays so you  can pick the items you'd like, but yea, there are no tongs T-T

:P


my order for more 1:24 trays hadn't arrived yet, these were the only almost-to-scale plates i had (chrysnbon!) ...it would work better if i had some designy arty farty thing to tie it all together. and maybe a little height variation. :S
gaaahhh


some cupcakes and mango cake slices..... the strawberry items on the right are old works that are cringeworthy XD i'll swap them out when i make more 1:24 items :D
 wee macaron towers! ^ ^ a little christmassy hee hee

i'm quite happy with this counter, it's almost exactly how i envisioned it to be used ('cept maybe more  range of items :( )
it'll do for now.
my only 'designy' thing? does it qualify?
had so many grand plans for this, alas, took too long to make it. 2 hrs to design it, another 2 hrs for execution, toldya i work slow :( 

here's my process:

i originally thought a google image search for similar tables would make my job easier, but i had no idea what search terms to use (permutations of modern, metal, fancy, table legs, IKEA didn't turn up much T-T) so i took inspiration from victorian table legs, drew an outline using inkscape, printed it onto the back of a metal sticker sheet (from Daiso!) and cut it out, then sticking it onto a piece of mounting board which acted as a table top....then covering it with another rectangular piece of metal sheet. it's not perfect, i think it could do with a re-do.... , but i think it's not-too-shabby for something i came up with from scratch! just don't look too closely XD

i added a piece of PVC sheet (1-1.5mm thick can't recall) cos i wanted to have at least 1 table with a glass top on it. i hope to put some posters or flyers/promotions under the 'glass' that can act as decorations.  

oooo i like this shot.
the inspiration came from a stainless steel IKEA table i saw a long time ago and want for my real life home.... made it slightly larger so that it could possibly double up (HURHUR) as a 1:12 coffee table or summat.

===============================
ok so that's about it for the 'vanity shots'. here're some behind-the-scene shots....


 it's supposed to be a sliding door, but i ran out of styrene channels, will pick more up when i have time.
 need to wipe down the windows XD the 3 'glass' panels are 1.5mm acrylic sheets that are removeable so i can display stuff with ease. i built slots into the ceiling and used styrene channels to hold the pieces in place.


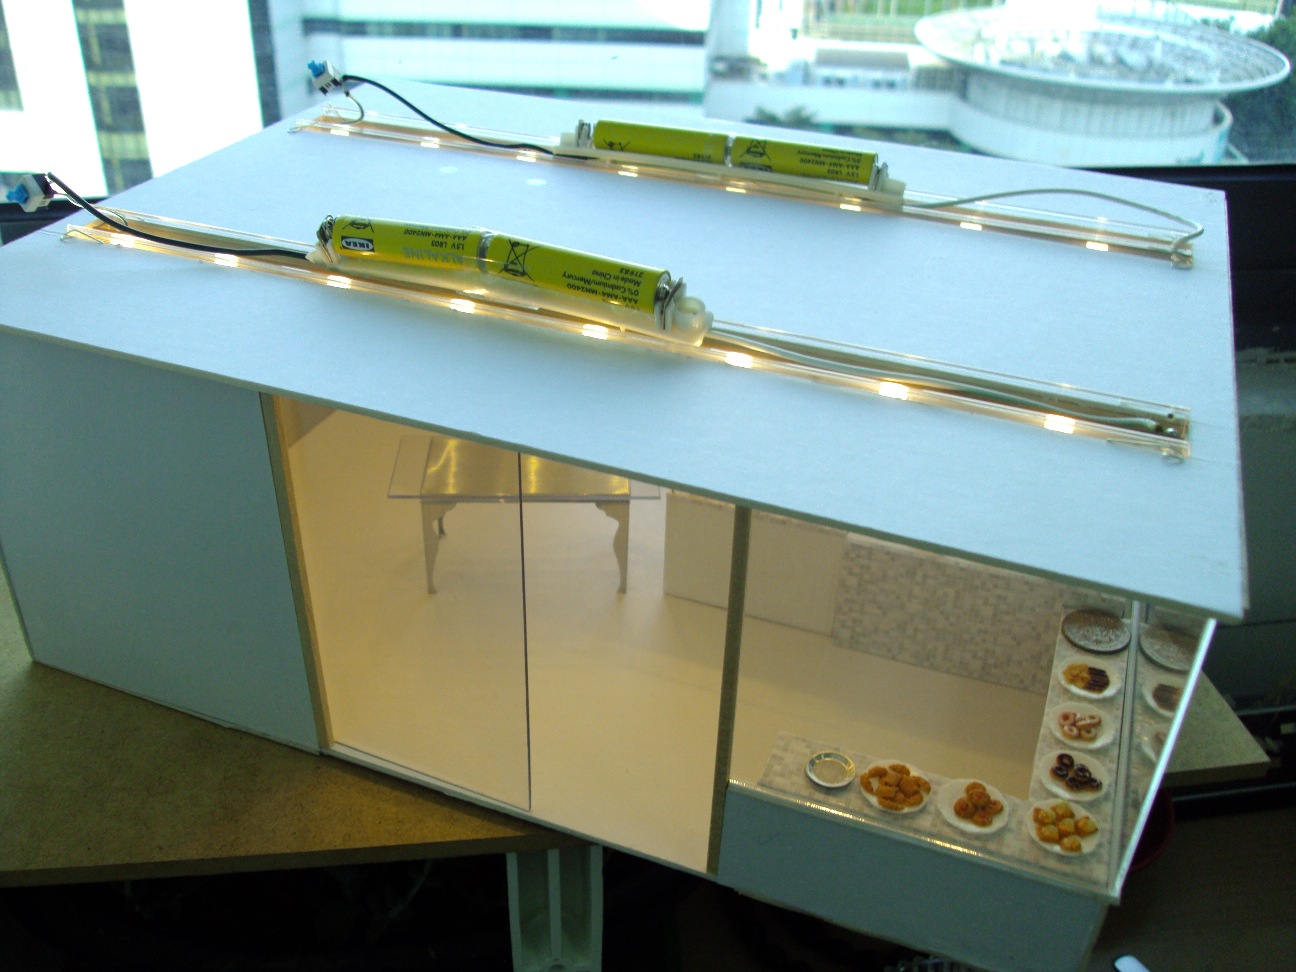
i've posted before about how i bashed some IKEA Billy Bookcase lights to use as lighting. was meaning to hide them in the roof, even cut out the pieces but ah well, you know me and time.....:S


if i had to pick my favourite items out of this challenge so far, it'd be these two. the macaron display counter, because it was my first 'complicated' piece of furniture made, and the table, cos i designed it from scratch, better yet, how well it turned out! *huge pats on my own back* IT'S NOT EVEN METAL LOL it's plastic stickers that SIMULATE metal!!! *snurk snurk snurk* 
-insert troll face smug look comic here-

well i hope to some day replicate it in stainless steel proper, yes, i like it -that- much. will make one in 1:12 once i figure out how to make it sturdier and neater.


used the wrong WB mode on my camera, hurhur. they're really small! forgot to take measurements...i had difficulty taking photos with and without the roof on....accidentally flipped some plates a coupla times, which is a scary thing since the pastries are approx 0.3cm to 0.6 cm wide!??!


i put a 1:12 cupcake next to the 1:24 for comparison (the cake behind is another WIP, my whole work table is littered with them.....-_-")


Thus concludes the I'm a Giant challenge!

of course i'm more than a little disappointed that i didn't complete it, not that it would be possible. just like me, this will be a constant WIP forever. XD there's a lot more that needs to be done, like the addition of a kitchen, maybe a 2nd floor, the roof.... I learnt alot about composition, drafting layouts, building a roombox with minimal resources and of course, that I CAN FRICKING DO THIS. Thank you Emily! it has been fun, and immensely inspirational. not only that, it's been quite amazing, following the progress of bloggers and flickr friends who have played along with me. Stephanie (Asuka), Stephanie (Petitplat) and I have been constantly egging each other on for this challenge too, that added a friendly competitive element to it (OMG PRESSURE AND JEALOUSY THEIR WORKS ARE AWESOME).....i even made a new blog friend out of this, i not only admire onshore's  japanese tea house, her blog has many wonderful pictures and posts....the kind of stuff i'd like in my real life!!! call-small has been my constant source of envy and inspiration....the Rad Pad is RAD indeed!
(dangit it appears some of the comments i left on their blogs last night have disappeared :( agrgghgh)


 there's numerous other participants, you can view some of them here:


i'm going to try and surf every single link in that post tmrw at the office XD


there is a huuuge sense of relief that this is now over. i can now concentrate on what i've been doing on weekdays (i kept most of this challenge work to weekends and a few stolen minutes every morning).....to end this on a happy note, i've been told by a coupla people that my entry for the minitreasures advent calendar made it to the front page of dA? i don't even understand that, but ...YAY!


YAYYYY!!! ok g'nite everyone!!! please link me your blog if you've participated too, i'd love to see!!!

===============================

UPDATE: i just read over on Emily's site (the one who started this madness XD ) that the challenge has been extended! she's deciding on a new date, and is suggesting Feb 1st. sounds good to me, any extension will be GREAT HURHURHURHUR

*hopeful again!!!*

Tuesday, December 6, 2011

I'm a Giant Challenge Day 10

ook, i'm a week late with updates! i have been quite busy with custom requests and finishing up some WIPs, so  didn't have much time to work on this, however, i dedicated last saturday to completing the ceiling and flooring, as well as finishing up the display units :) it's coming along quite nicely, to the 'feel' i've been trying to get.

ok so is the latest pic, sans floor. I originally started out rather ambitiously, thinking i could make a parquet flooring of sorts (grew up in various houses with parquet floors, love it more than tiles really), but given the amount of time and material i had left, i decided to go with a 'simpler' floorboard-type flooring. i thought that the roombox felt a little sterile for a bakery, which should be inviting and warm right? but the colours i chose made the roombox feel like a surgical room, which i prefer but eh, don't think it looks 'nice' for a bakery.... :-/


i used these wood veneer strips stuck onto cardstock, both of which i bought from Daiso aeons ago. i went back to find more of the veneer tape, but they only had the fake versions :( if you squint, you can see my disastrous attempts at using a paper punch on it. sure it worked, but i remember panicking over teamchat (HI TEAMMIDS!) back then whether i ruined my expensive paper punch on it XD consensus was, i did :( i've sharpened the punch since, but it never worked quite the same again....so to anyone who's thought about it, well, paper is also made of wood, but DON'T DO IT XD (my logic FAILED ME)

cutcutcut
stickstickstick
sandsandsand
hrm. doesn't quite work :( even though i like it!!
so i did something stupid. i PAINTED IT.

*groans*

 i really should have left it alone. 


but looking back at the photos, i think it's alright, innit? maybe it's cos i put in wooden strips on the ceiling which softened the harsh white lighting. i thought about painting it white but i liked how it 'softened' all the metal/white...? the floor isn't stuck in yet, but i don't have enough veneer to start over, nor finish up ALL of the flooring (which is alright, cos i planned to have the back portion be the kitchen, depending on whether i have time to complete it)....

or should i just use the original plain flooring? opinions anyone? would really appreciate the help! deadline's next week AHHHHHHHHHHHHHhhhhhhhhhhhhhhhhhhhhhhhh *runs wildly arms flailing*
-------------------------

oh, i forgot to write about the tiles, someone asked on flickr which then reminded me to include it (though i did put it in the material list here http://snowfern-clover.blogspot.com/p/challenge.html )

edited the image (courtesy of http://www.flickr.com/photos/zooboing/ please read his licencing terms) using Inkscape, printed at Xorex onto glossy sticker paper, scored it then stuck it in place. :)


Thursday, November 24, 2011

I'm a Giant Challenge Day 9

The lights are IN!!!! 


i'm a little late again this week, had a few things to finish up, and my laptop died yesterday T-T luckily, bf, who has MAGIC HANDS I TELLSYA (well in more ways than...NEVERMIND) fixed it!!! he removed the battery, which i think overheated and short-circuited something somewhere. i've done a little bit of backup for the more important stuff, like templates and graphics etc....this poor laptop has served me very well for over 5 years, but i'm not ready to let it retire yet! :P

back to the challenge...
before - with flash (lousy phonecam pic)
after - no need for flash! ^ ^ :P same lousy phonecam pic.

before - the left side...a little creepy....

ahhh much better!


i took apart 2 IKEA 'Billy Bookcase' Lights which i'd purchased a few months back, thinking it'd be perfect for lighting a 1:12 shop....why not for 1:24 too eh?

i was thinking of putting up a 'how i did it' with photos, but it's so dead simple i don't know if it's worth the trouble. but since i have one intact (i bought 3 ;P they were so cheap, i think not more than SGD$5 each excluding 2 AAA batteries) i might if i remember to in the future :X

Still need to find some nice mosaic tile printables and figure out what sort of wallpaper/texture i'd like for both inside and out. the roof still needs to be assembled, i've cut out the pieces but haven't quite yet thought through how i'll make the light switches accessible...i like the 'hidden access' sort better than visible buttons, so that'll require a bit more work and planning. which i don't have, the deadline for this is 3 weeks away, and there's lots more for me to do yet -_-"

one of the wires came loose, and i had to whip out my soldering iron, which i'm deathly afraid of, but i managed to get it back onto the circuit and now i'm itching to try out -proper- soldering for some of the ideas i have in mind for decorating the bakery. it -is- a decorating challenge after all, isn't it?

meager update, but i'm so pleased with how it turned out. how's your dollhouse coming along?